
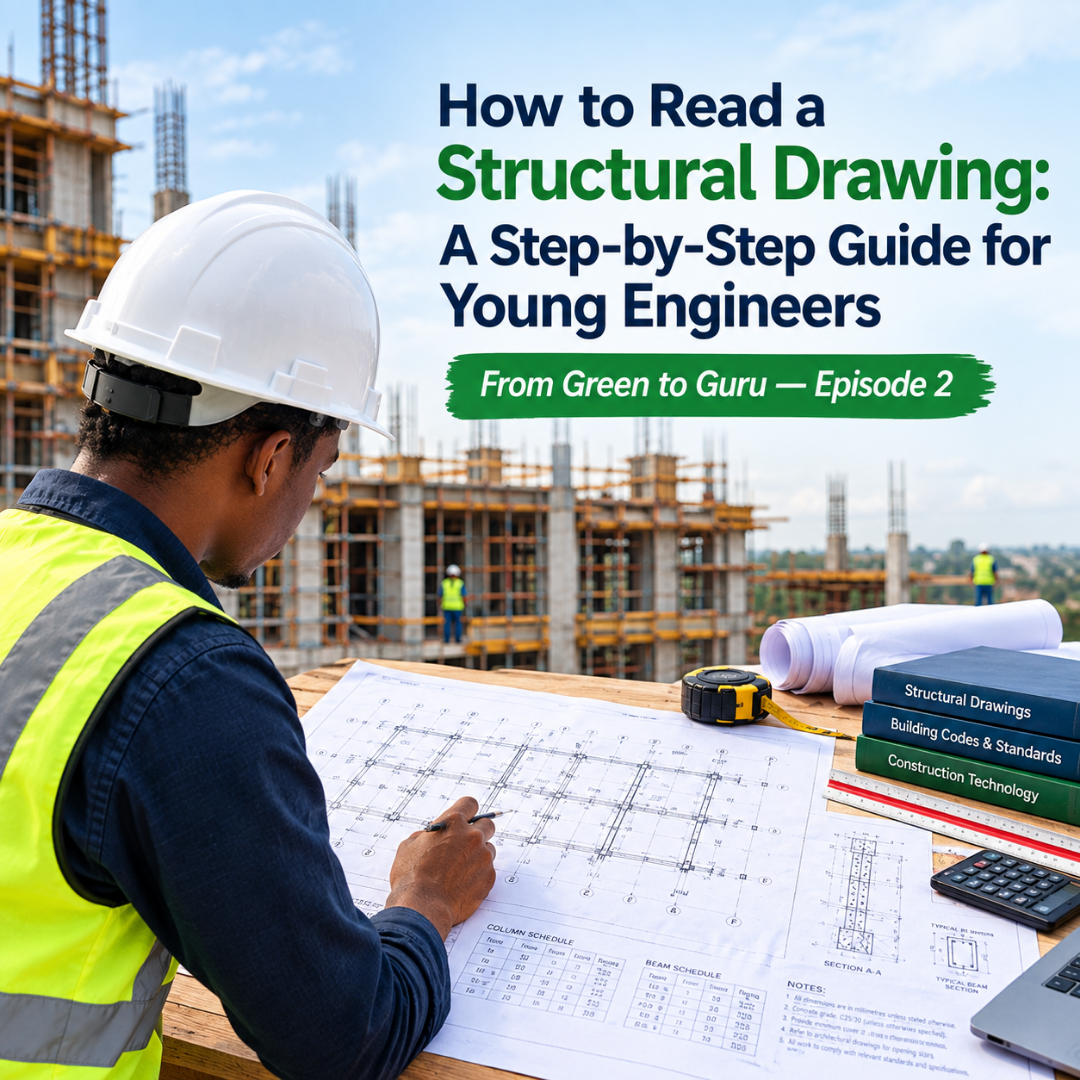
How to Read a Structural Drawing: A Step-by-Step Guide for Young Engineers
From Green to Guru — Episode 2
A structural drawing is not just a picture of a building.
It is a technical instruction that communicates how the structural engineer intends the building to be constructed.
For a young engineer, learning to read structural drawings is one of the most important steps from classroom engineering to practical engineering.
You do not need to understand every detail on your first day.
But you should develop a systematic method.
At Engineering Resource Academy (ERA), we recommend a simple principle:
«Don't look at a structural drawing. Read it.»
There is a difference.
Looking at a drawing means seeing lines, numbers, symbols and notes.
Reading a drawing means understanding what those things are telling you to construct.
1. First Understand What a Structural Drawing Is
A structural drawing communicates information about the structural components of a building.
Depending on the project, it may contain information about:
- Foundations
- Columns
- Beams
- Slabs
- Staircases
- Retaining walls
- Structural walls
- Reinforcement
- Levels
- Dimensions
- Construction details
- Sections
- Schedules
- Notes and specifications
The drawing should enable the construction team to understand what is required, where it is required and how it is to be constructed, subject to the project specifications and other contract documents.
2. Do Not Start With the Reinforcement
This is one of the common mistakes made by beginners.
A young engineer opens a drawing and immediately starts looking for:
«"Y16 @ 150 c/c"»
or
«"T12 @ 200"»
That is not the best place to start.
Before studying reinforcement, understand the building's structural arrangement.
Start with:
Foundation → Columns/Walls → Beams → Slabs → Roof
Think of the building as a load path.
A simplified gravity-load path is:
Slab → Beam → Column → Foundation → Soil
Not every structural system follows exactly this arrangement, but this basic concept gives a beginner an excellent starting point.
3. Start With the Drawing Title Block
Before studying the drawing itself, look at the title block.
It usually contains important information such as:
- Project name
- Client
- Drawing title
- Drawing number
- Revision
- Scale
- Date
- Designer/consultant information
- Status of the drawing
The drawing number is important because a project may contain hundreds or thousands of drawings.
The revision is equally important.
Imagine constructing according to an old drawing when an approved revision has already changed the column positions.
That could create a serious problem.
Therefore, develop the habit:
«Check the drawing number and revision before using the drawing.»
4. Understand the Grid System
The grid is one of the most important things to understand.
Structural drawings commonly use grids to establish the position of structural elements.
For example:
A, B, C, D
may run in one direction, while:
1, 2, 3, 4
run in the other.
The intersection of the grid lines provides a reference location.
For example:
B/3
means the intersection of Grid B and Grid 3.
This is why you may see a column identified by a reference such as:
C1 @ B/3
The exact notation varies from project to project, so always check the project's drawing conventions.
The key principle is:
«Grid references tell you where structural elements are located.»
5. Find the Columns
Once you understand the grids, identify the columns.
Look for column references such as:
- C1
- C2
- C3
- C4
The exact numbering system varies.
Then check the column schedule, if provided.
A column schedule may tell you:
- Column reference
- Column size
- Reinforcement
- Links/ties
- Concrete grade
- Level range
For example, a schedule might indicate that a particular column is:
300 × 300 mm
with specified longitudinal reinforcement and links.
But do not assume that every column is the same.
Different columns may have different sizes and reinforcement requirements.
6. Follow the Column Through the Building
This is where structural drawing reading becomes interesting.
A column on the ground floor may not necessarily have exactly the same arrangement on every floor.
You need to understand:
- Where the column starts
- Where it terminates
- Whether its size changes
- Whether it continues upward
- Whether it stops
- Whether it transfers onto a beam or other structural element
- Whether its reinforcement changes
This is why simply looking at one floor plan is not enough.
A structural engineer thinks in three dimensions.
You should gradually learn to do the same.
7. Identify the Beams
Next, identify the beams.
Beam references might look like:
- B1
- B2
- B3
- B4
Again, numbering conventions differ from project to project.
The beam schedule may provide information such as:
- Beam size
- Width
- Overall depth
- Reinforcement
- Links
- Concrete specification
- Level
For example:
B1 — 250 × 450 mm
would generally indicate a beam width and overall depth of 250 mm and 450 mm respectively, subject to the project's notation.
But don't stop there.
Ask:
Where does the beam start?
Where does it end?
What supports it?
What does it support?
Does it continue through a column?
Does it frame into another beam?
These questions help you understand the structural system.
8. Understand Beam Reinforcement
Now we can begin looking at reinforcement.
A beam drawing may show reinforcement such as:
2Y16 TOP
2Y20 BOTTOM
Y10 LINKS @ 150 c/c
The exact notation depends on the project's standards and drawing conventions.
The beginner should understand the basic meaning:
- Y16 — 16 mm high-yield reinforcing bar
- Y20 — 20 mm high-yield reinforcing bar
- @ 150 c/c — spaced at 150 mm centres
- Top — reinforcement located toward the top of the beam
- Bottom — reinforcement located toward the bottom
But remember:
Never interpret reinforcement notation in isolation.
You must consider the detail, section, notes and applicable project standard.
9. Understand Why the Reinforcement Is There
This is where the young engineer begins to move from drawing reader to engineer.
Suppose you see additional top reinforcement over a support.
Don't just say:
«"The drawing says Y20."»
Ask:
«Why is additional top reinforcement required here?»
The answer relates to structural behaviour.
In a typical continuous beam under gravity loading, negative bending moments can occur over supports, producing tension toward the top of the beam.
Therefore, reinforcement is provided in the appropriate region to resist that tension.
The drawing is communicating the result of structural analysis and design.
Your job is to understand the relationship between:
Structural behaviour → Design → Detailing → Construction
10. Learn to Read Sections
Plans show you where things are located horizontally.
Sections help you understand what happens vertically.
A section can show:
- Beam depth
- Slab thickness
- Column dimensions
- Reinforcement position
- Concrete cover
- Levels
- Foundation depth
- Floor-to-floor height
- Construction details
For a beginner, sections can initially look confusing.
But use a simple rule:
«A plan tells you where. A section often tells you how it looks through the height or depth.»
The two should be read together.
11. Learn Slab Drawings
A slab drawing may contain information about:
- Slab thickness
- Slab type
- Span direction
- Main reinforcement
- Distribution reinforcement
- Top reinforcement
- Bottom reinforcement
- Additional reinforcement
- Openings
- Construction joints
- Levels
One of the first questions you should ask is:
«Which direction is the slab spanning?»
This helps you understand the direction in which the slab transfers load.
For example, in a simplified one-way slab:
Slab → Supporting beams/walls → Columns → Foundation
Understanding this load path helps you make sense of the reinforcement arrangement.
12. Learn to Read the Foundation Layout
Now go to the bottom of the building.
The foundation drawing may show:
- Pad foundations
- Strip foundations
- Raft foundation
- Pile caps
- Ground beams
- Foundation dimensions
- Reinforcement
- Levels
- Column positions
You should be able to connect the foundation drawing to the column layout above it.
Ask:
Which foundation supports which column?
For example:
C1 → F1
may indicate that Column C1 is supported by Foundation F1, depending on the project's notation.
That simple connection is fundamental.
13. Understand Schedules
Schedules are extremely useful.
A drawing may not show every piece of information beside every structural element.
Instead, it may refer you to a schedule.
For example:
C1
may direct you to the column schedule.
B3
may direct you to the beam schedule.
F2
may direct you to the foundation schedule.
Therefore:
«Never read a structural plan without checking the associated schedules.»
14. Understand Drawing Notes
General notes are often overlooked by beginners.
That is a mistake.
Notes may contain requirements relating to:
- Concrete
- Reinforcement
- Concrete cover
- Construction joints
- Laps
- Anchorage
- Formwork
- Tolerances
- Materials
- Workmanship
- Applicable standards
A drawing is not fully understood if the engineer ignores its notes.
15. Learn to Cross-Check Drawings
Structural drawings do not exist in isolation.
A structural engineer or site engineer may need to coordinate information with:
- Architectural drawings
- Mechanical drawings
- Electrical drawings
- Plumbing drawings
- Geotechnical information
- Survey information
- Specifications
For example, an architectural drawing may show a door opening.
The structural engineer must ensure that the structural arrangement accommodates that opening.
Similarly, MEP services may require openings through slabs or beams.
These should not simply be created on site because somebody needs space for a pipe.
They must be properly coordinated.
16. Never Construct From an Unverified Drawing
Before construction, confirm:
- Is this the latest revision?
- Is it approved for construction?
- Does it agree with the relevant architectural information?
- Does it agree with other structural drawings?
- Are there discrepancies?
- Are there outstanding RFIs or instructions?
- Are there approved changes?
If you identify a discrepancy, do not simply improvise.
Raise it through the appropriate project procedure.
A young engineer should never be afraid to stop and ask for clarification when the information is unclear.
17. The 10-Year-Old Method
At ERA, we can simplify structural drawing reading into five questions.
Whenever you see a structural drawing, ask:
1. WHAT?
What am I looking at?
Is it a foundation, column, beam, slab or detail?
2. WHERE?
Where is it located?
Which grid?
Which level?
Which reference?
3. HOW BIG?
What are its dimensions?
4. WHAT IS INSIDE IT?
What reinforcement or other structural components are required?
5. WHY?
Why has the engineer designed it this way?
That fifth question is what takes you beyond simply reading drawings.
18. A Simple Structural Drawing Reading Sequence
When given a new structural drawing package, do not open random drawings.
Use a sequence.
Step 1 — Identify the project
Know the project and drawing package.
Step 2 — Check the revision
Make sure you are using the correct issue.
Step 3 — Read the general notes
Understand the important requirements.
Step 4 — Understand the grids
Know the building's reference system.
Step 5 — Study the foundation
Understand how the building reaches the ground.
Step 6 — Study the columns/walls
Follow the vertical load-bearing elements.
Step 7 — Study the beams
Understand how they connect the structural system.
Step 8 — Study the slabs
Understand their spans and support conditions.
Step 9 — Read schedules
Cross-reference C, B, F and other structural references.
Step 10 — Study sections and details
Use them to understand the three-dimensional arrangement.
Step 11 — Cross-check other disciplines
Look for architectural and MEP coordination issues.
Step 12 — Compare drawing with reality
When you get to site, verify whether what has been constructed corresponds with the approved information.
19. What Should a Young Engineer Be Able to Do After Learning This?
A young engineer should progressively be able to stand on a construction site and answer questions such as:
Where is Grid B?
Where is Column C1?
What is the size of C1?
Which foundation supports C1?
Which beams connect to C1?
What slab does this beam support?
What reinforcement is required?
What is the spacing of the links?
What is the concrete cover?
What level should this beam be at?
Which drawing and revision provides this information?
If you cannot answer these questions yet, don't worry.
You are learning.
The objective is to become progressively better at connecting the information.
20. The Real Skill: Seeing the Building Inside the Drawing
Eventually, something changes.
You stop seeing a drawing as lines on paper.
You begin to see the building.
You can look at a foundation layout and imagine the columns above it.
You can look at a column layout and imagine the beams framing into the columns.
You can look at a beam and understand how the slab interacts with it.
You can look at reinforcement and begin to understand the structural behaviour that produced the detailing.
That is when drawing reading begins to become engineering understanding.
Final Thought
A structural drawing is a language.
The symbols, grids, dimensions, schedules, sections and reinforcement details are its vocabulary.
A young engineer must learn that language before confidently supervising the physical construction represented by the drawing.
At Engineering Resource Academy, we believe that the journey from Green to Guru begins with learning to see beyond the lines on the paper.
Read the drawing.
Understand the structure.
Verify the work.
Then make the engineering decision.
That is practical engineering.
Engineering Resource Academy (ERA)
From Green to Guru
From Green to Guru — Episode 2
A structural drawing is not just a picture of a building.
It is a technical instruction that communicates how the structural engineer intends the building to be constructed.
For a young engineer, learning to read structural drawings is one of the most important steps from classroom engineering to practical engineering.
You do not need to understand every detail on your first day.
But you should develop a systematic method.
At Engineering Resource Academy (ERA), we recommend a simple principle:
«Don't look at a structural drawing. Read it.»
There is a difference.
Looking at a drawing means seeing lines, numbers, symbols and notes.
Reading a drawing means understanding what those things are telling you to construct.
1. First Understand What a Structural Drawing Is
A structural drawing communicates information about the structural components of a building.
Depending on the project, it may contain information about:
- Foundations
- Columns
- Beams
- Slabs
- Staircases
- Retaining walls
- Structural walls
- Reinforcement
- Levels
- Dimensions
- Construction details
- Sections
- Schedules
- Notes and specifications
The drawing should enable the construction team to understand what is required, where it is required and how it is to be constructed, subject to the project specifications and other contract documents.
2. Do Not Start With the Reinforcement
This is one of the common mistakes made by beginners.
A young engineer opens a drawing and immediately starts looking for:
«"Y16 @ 150 c/c"»
or
«"T12 @ 200"»
That is not the best place to start.
Before studying reinforcement, understand the building's structural arrangement.
Start with:
Foundation → Columns/Walls → Beams → Slabs → Roof
Think of the building as a load path.
A simplified gravity-load path is:
Slab → Beam → Column → Foundation → Soil
Not every structural system follows exactly this arrangement, but this basic concept gives a beginner an excellent starting point.
3. Start With the Drawing Title Block
Before studying the drawing itself, look at the title block.
It usually contains important information such as:
- Project name
- Client
- Drawing title
- Drawing number
- Revision
- Scale
- Date
- Designer/consultant information
- Status of the drawing
The drawing number is important because a project may contain hundreds or thousands of drawings.
The revision is equally important.
Imagine constructing according to an old drawing when an approved revision has already changed the column positions.
That could create a serious problem.
Therefore, develop the habit:
«Check the drawing number and revision before using the drawing.»
4. Understand the Grid System
The grid is one of the most important things to understand.
Structural drawings commonly use grids to establish the position of structural elements.
For example:
A, B, C, D
may run in one direction, while:
1, 2, 3, 4
run in the other.
The intersection of the grid lines provides a reference location.
For example:
B/3
means the intersection of Grid B and Grid 3.
This is why you may see a column identified by a reference such as:
C1 @ B/3
The exact notation varies from project to project, so always check the project's drawing conventions.
The key principle is:
«Grid references tell you where structural elements are located.»
5. Find the Columns
Once you understand the grids, identify the columns.
Look for column references such as:
- C1
- C2
- C3
- C4
The exact numbering system varies.
Then check the column schedule, if provided.
A column schedule may tell you:
- Column reference
- Column size
- Reinforcement
- Links/ties
- Concrete grade
- Level range
For example, a schedule might indicate that a particular column is:
300 × 300 mm
with specified longitudinal reinforcement and links.
But do not assume that every column is the same.
Different columns may have different sizes and reinforcement requirements.
6. Follow the Column Through the Building
This is where structural drawing reading becomes interesting.
A column on the ground floor may not necessarily have exactly the same arrangement on every floor.
You need to understand:
- Where the column starts
- Where it terminates
- Whether its size changes
- Whether it continues upward
- Whether it stops
- Whether it transfers onto a beam or other structural element
- Whether its reinforcement changes
This is why simply looking at one floor plan is not enough.
A structural engineer thinks in three dimensions.
You should gradually learn to do the same.
7. Identify the Beams
Next, identify the beams.
Beam references might look like:
- B1
- B2
- B3
- B4
Again, numbering conventions differ from project to project.
The beam schedule may provide information such as:
- Beam size
- Width
- Overall depth
- Reinforcement
- Links
- Concrete specification
- Level
For example:
B1 — 250 × 450 mm
would generally indicate a beam width and overall depth of 250 mm and 450 mm respectively, subject to the project's notation.
But don't stop there.
Ask:
Where does the beam start?
Where does it end?
What supports it?
What does it support?
Does it continue through a column?
Does it frame into another beam?
These questions help you understand the structural system.
8. Understand Beam Reinforcement
Now we can begin looking at reinforcement.
A beam drawing may show reinforcement such as:
2Y16 TOP
2Y20 BOTTOM
Y10 LINKS @ 150 c/c
The exact notation depends on the project's standards and drawing conventions.
The beginner should understand the basic meaning:
- Y16 — 16 mm high-yield reinforcing bar
- Y20 — 20 mm high-yield reinforcing bar
- @ 150 c/c — spaced at 150 mm centres
- Top — reinforcement located toward the top of the beam
- Bottom — reinforcement located toward the bottom
But remember:
Never interpret reinforcement notation in isolation.
You must consider the detail, section, notes and applicable project standard.
9. Understand Why the Reinforcement Is There
This is where the young engineer begins to move from drawing reader to engineer.
Suppose you see additional top reinforcement over a support.
Don't just say:
«"The drawing says Y20."»
Ask:
«Why is additional top reinforcement required here?»
The answer relates to structural behaviour.
In a typical continuous beam under gravity loading, negative bending moments can occur over supports, producing tension toward the top of the beam.
Therefore, reinforcement is provided in the appropriate region to resist that tension.
The drawing is communicating the result of structural analysis and design.
Your job is to understand the relationship between:
Structural behaviour → Design → Detailing → Construction
10. Learn to Read Sections
Plans show you where things are located horizontally.
Sections help you understand what happens vertically.
A section can show:
- Beam depth
- Slab thickness
- Column dimensions
- Reinforcement position
- Concrete cover
- Levels
- Foundation depth
- Floor-to-floor height
- Construction details
For a beginner, sections can initially look confusing.
But use a simple rule:
«A plan tells you where. A section often tells you how it looks through the height or depth.»
The two should be read together.
11. Learn Slab Drawings
A slab drawing may contain information about:
- Slab thickness
- Slab type
- Span direction
- Main reinforcement
- Distribution reinforcement
- Top reinforcement
- Bottom reinforcement
- Additional reinforcement
- Openings
- Construction joints
- Levels
One of the first questions you should ask is:
«Which direction is the slab spanning?»
This helps you understand the direction in which the slab transfers load.
For example, in a simplified one-way slab:
Slab → Supporting beams/walls → Columns → Foundation
Understanding this load path helps you make sense of the reinforcement arrangement.
12. Learn to Read the Foundation Layout
Now go to the bottom of the building.
The foundation drawing may show:
- Pad foundations
- Strip foundations
- Raft foundation
- Pile caps
- Ground beams
- Foundation dimensions
- Reinforcement
- Levels
- Column positions
You should be able to connect the foundation drawing to the column layout above it.
Ask:
Which foundation supports which column?
For example:
C1 → F1
may indicate that Column C1 is supported by Foundation F1, depending on the project's notation.
That simple connection is fundamental.
13. Understand Schedules
Schedules are extremely useful.
A drawing may not show every piece of information beside every structural element.
Instead, it may refer you to a schedule.
For example:
C1
may direct you to the column schedule.
B3
may direct you to the beam schedule.
F2
may direct you to the foundation schedule.
Therefore:
«Never read a structural plan without checking the associated schedules.»
14. Understand Drawing Notes
General notes are often overlooked by beginners.
That is a mistake.
Notes may contain requirements relating to:
- Concrete
- Reinforcement
- Concrete cover
- Construction joints
- Laps
- Anchorage
- Formwork
- Tolerances
- Materials
- Workmanship
- Applicable standards
A drawing is not fully understood if the engineer ignores its notes.
15. Learn to Cross-Check Drawings
Structural drawings do not exist in isolation.
A structural engineer or site engineer may need to coordinate information with:
- Architectural drawings
- Mechanical drawings
- Electrical drawings
- Plumbing drawings
- Geotechnical information
- Survey information
- Specifications
For example, an architectural drawing may show a door opening.
The structural engineer must ensure that the structural arrangement accommodates that opening.
Similarly, MEP services may require openings through slabs or beams.
These should not simply be created on site because somebody needs space for a pipe.
They must be properly coordinated.
16. Never Construct From an Unverified Drawing
Before construction, confirm:
- Is this the latest revision?
- Is it approved for construction?
- Does it agree with the relevant architectural information?
- Does it agree with other structural drawings?
- Are there discrepancies?
- Are there outstanding RFIs or instructions?
- Are there approved changes?
If you identify a discrepancy, do not simply improvise.
Raise it through the appropriate project procedure.
A young engineer should never be afraid to stop and ask for clarification when the information is unclear.
17. The 10-Year-Old Method
At ERA, we can simplify structural drawing reading into five questions.
Whenever you see a structural drawing, ask:
1. WHAT?
What am I looking at?
Is it a foundation, column, beam, slab or detail?
2. WHERE?
Where is it located?
Which grid?
Which level?
Which reference?
3. HOW BIG?
What are its dimensions?
4. WHAT IS INSIDE IT?
What reinforcement or other structural components are required?
5. WHY?
Why has the engineer designed it this way?
That fifth question is what takes you beyond simply reading drawings.
18. A Simple Structural Drawing Reading Sequence
When given a new structural drawing package, do not open random drawings.
Use a sequence.
Step 1 — Identify the project
Know the project and drawing package.
Step 2 — Check the revision
Make sure you are using the correct issue.
Step 3 — Read the general notes
Understand the important requirements.
Step 4 — Understand the grids
Know the building's reference system.
Step 5 — Study the foundation
Understand how the building reaches the ground.
Step 6 — Study the columns/walls
Follow the vertical load-bearing elements.
Step 7 — Study the beams
Understand how they connect the structural system.
Step 8 — Study the slabs
Understand their spans and support conditions.
Step 9 — Read schedules
Cross-reference C, B, F and other structural references.
Step 10 — Study sections and details
Use them to understand the three-dimensional arrangement.
Step 11 — Cross-check other disciplines
Look for architectural and MEP coordination issues.
Step 12 — Compare drawing with reality
When you get to site, verify whether what has been constructed corresponds with the approved information.
19. What Should a Young Engineer Be Able to Do After Learning This?
A young engineer should progressively be able to stand on a construction site and answer questions such as:
Where is Grid B?
Where is Column C1?
What is the size of C1?
Which foundation supports C1?
Which beams connect to C1?
What slab does this beam support?
What reinforcement is required?
What is the spacing of the links?
What is the concrete cover?
What level should this beam be at?
Which drawing and revision provides this information?
If you cannot answer these questions yet, don't worry.
You are learning.
The objective is to become progressively better at connecting the information.
20. The Real Skill: Seeing the Building Inside the Drawing
Eventually, something changes.
You stop seeing a drawing as lines on paper.
You begin to see the building.
You can look at a foundation layout and imagine the columns above it.
You can look at a column layout and imagine the beams framing into the columns.
You can look at a beam and understand how the slab interacts with it.
You can look at reinforcement and begin to understand the structural behaviour that produced the detailing.
That is when drawing reading begins to become engineering understanding.
Final Thought
A structural drawing is a language.
The symbols, grids, dimensions, schedules, sections and reinforcement details are its vocabulary.
A young engineer must learn that language before confidently supervising the physical construction represented by the drawing.
At Engineering Resource Academy, we believe that the journey from Green to Guru begins with learning to see beyond the lines on the paper.
Read the drawing.
Understand the structure.
Verify the work.
Then make the engineering decision.
That is practical engineering.
Engineering Resource Academy (ERA)
From Green to Guru